Back to Learning Center
Inventory
Glamiti's Inventory Management System helps you track stock levels, monitor sales, and manage orders efficiently. With real-time inventory tracking, you can make informed purchasing decisions, prevent stock shortages, and streamline your business operations.
Manage Products
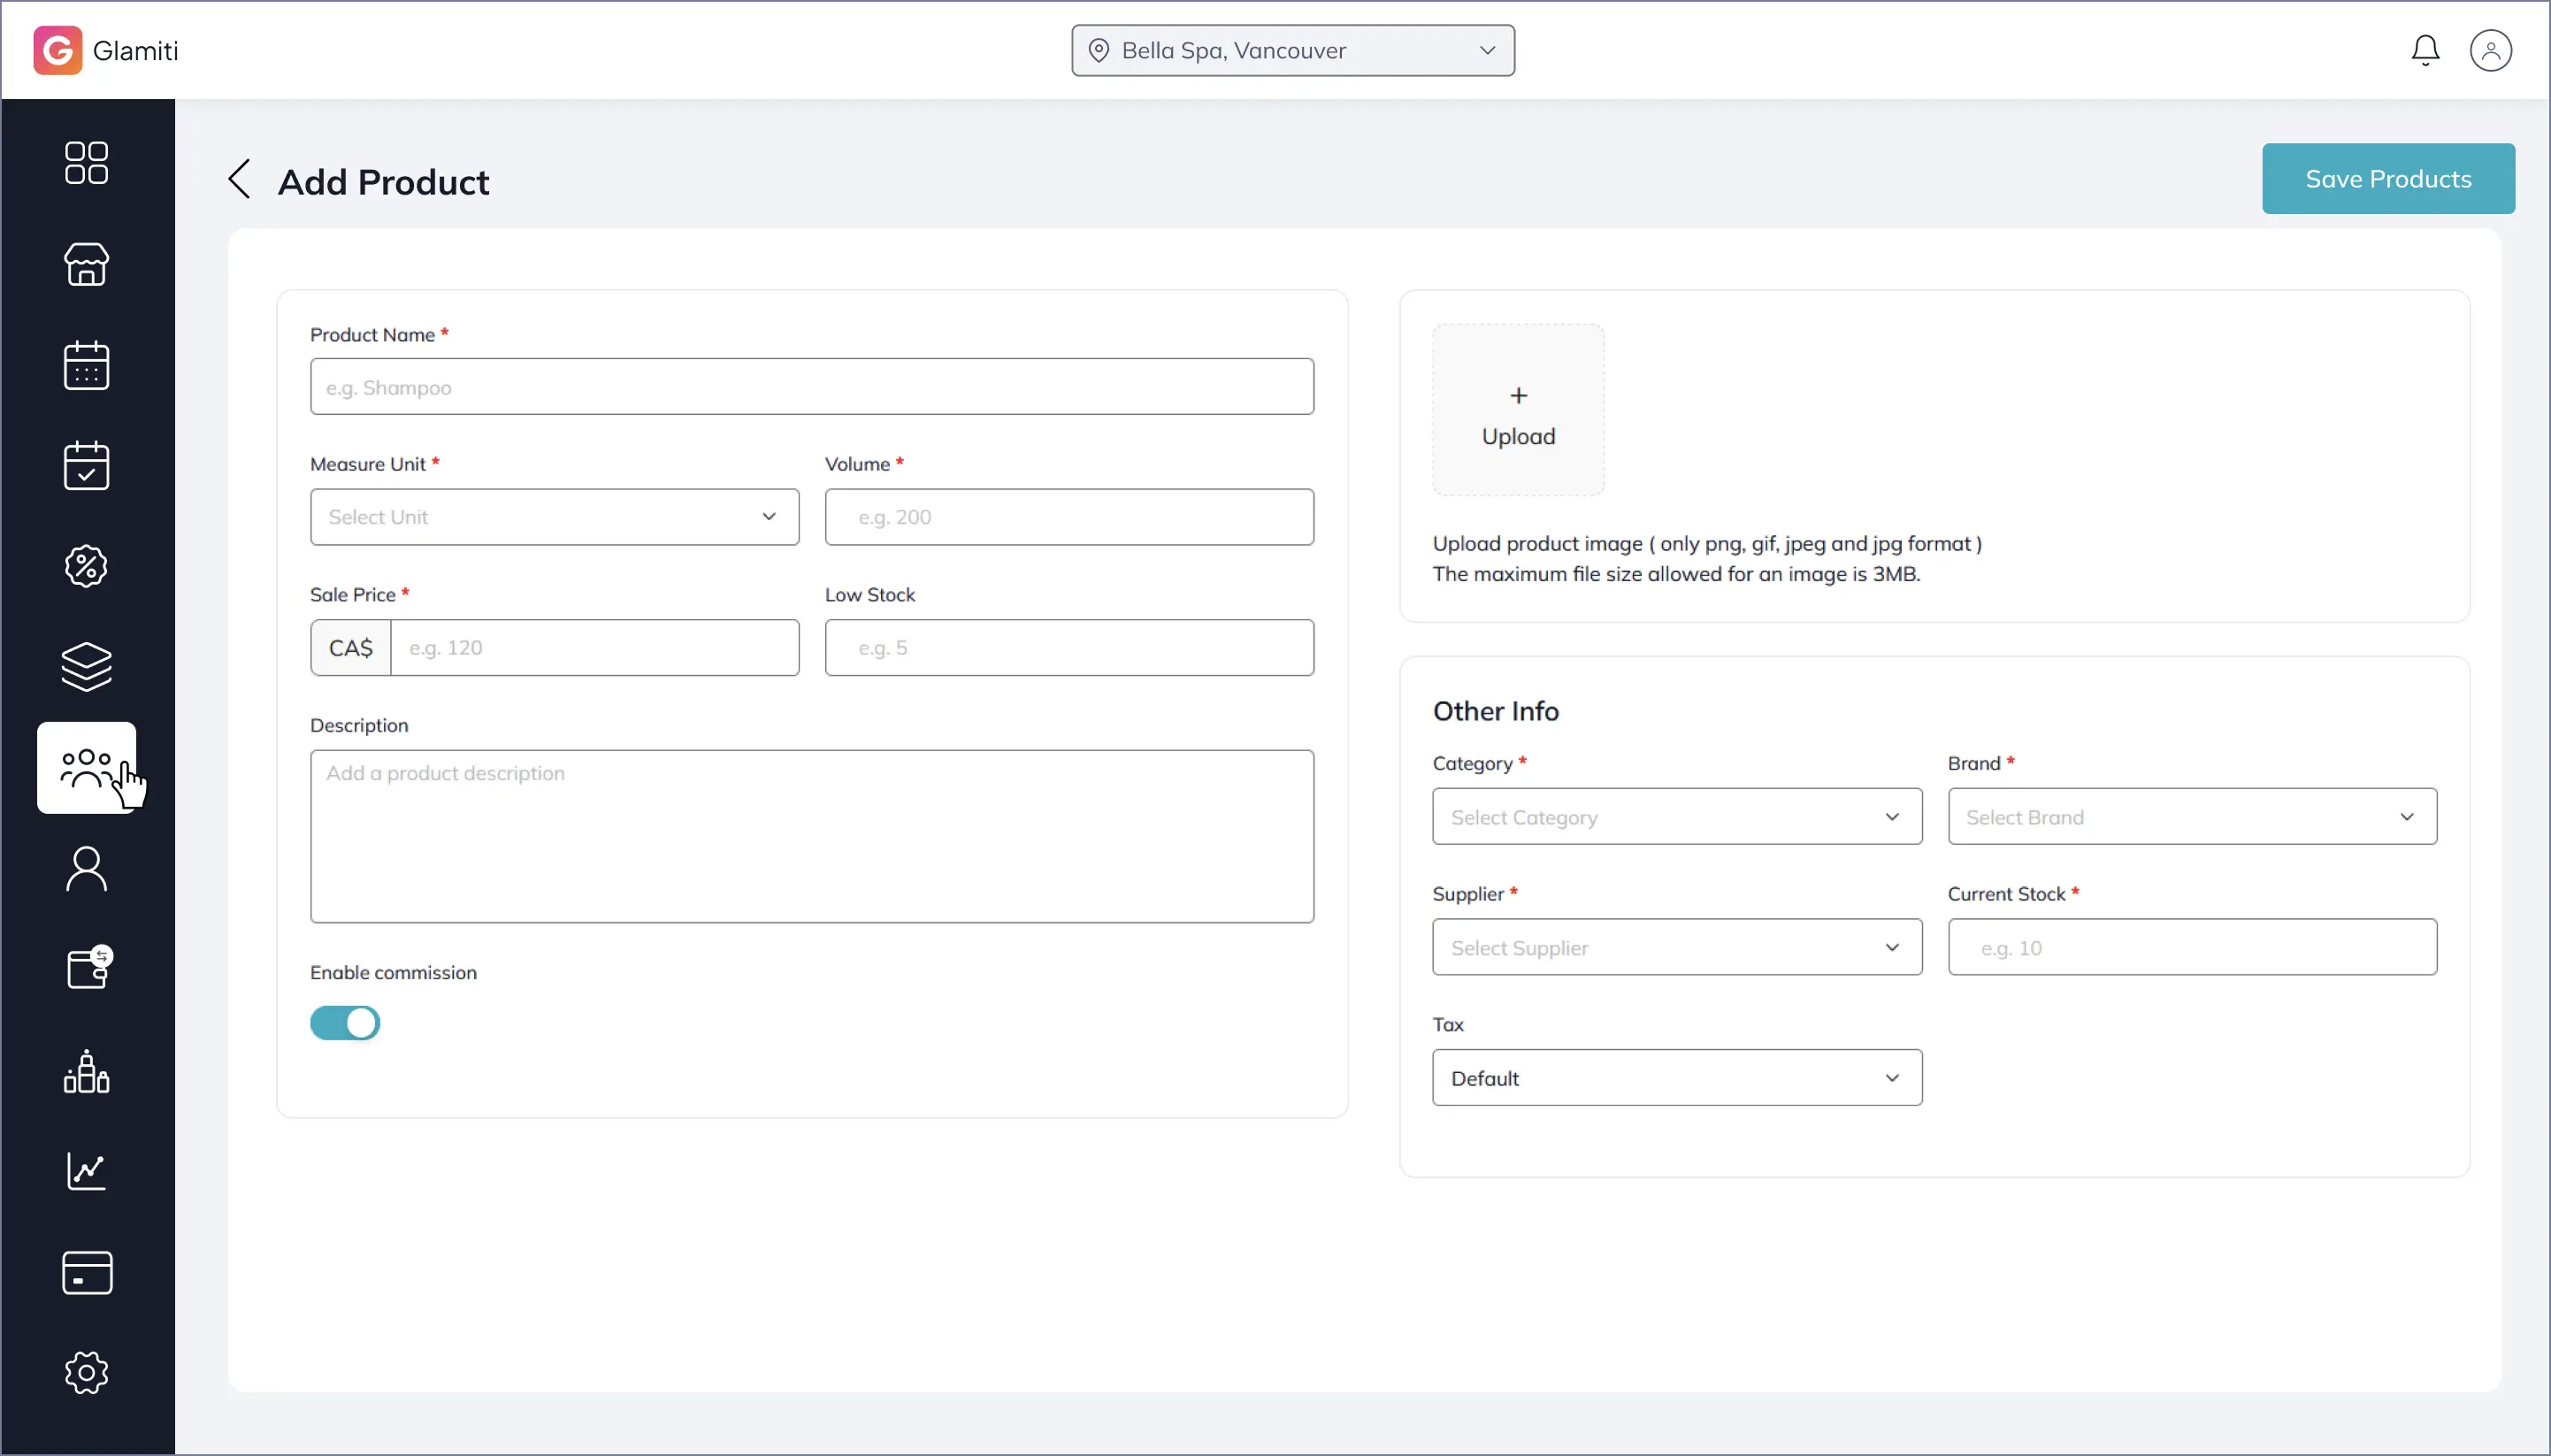
Add Products
To add a product to your inventory:
1.
Navigate to the Inventory section and select Add Product
2.
Fill in the product details:
◦
Product Name
◦
Unit of Measurement
◦
Volume
◦
Cost Price & Selling Price
◦
Low Stock Threshold
3.
Enable Professional Commission if applicable.
4.
(Optional) Add a Product Description.
5.
Assign a Brand, Category, and Supplier. If none exist, create them directly on the same screen.
6.
Enter the Current Stock Level.
7.
Apply a Tax Rate if needed.
8.
Upload a Product Image.
9.
Click Save to add the product to your inventory.
Track Inventory
To view product stock and sales history:
1.
Go to the Inventory section and select a product.
2.
On the product details page, you can access:
◦
Sales History
-hows when and how much of the product was sold or returned, including SKU details.
◦
Order Information
- Displays product orders, SKU details, and remaining stock levels.
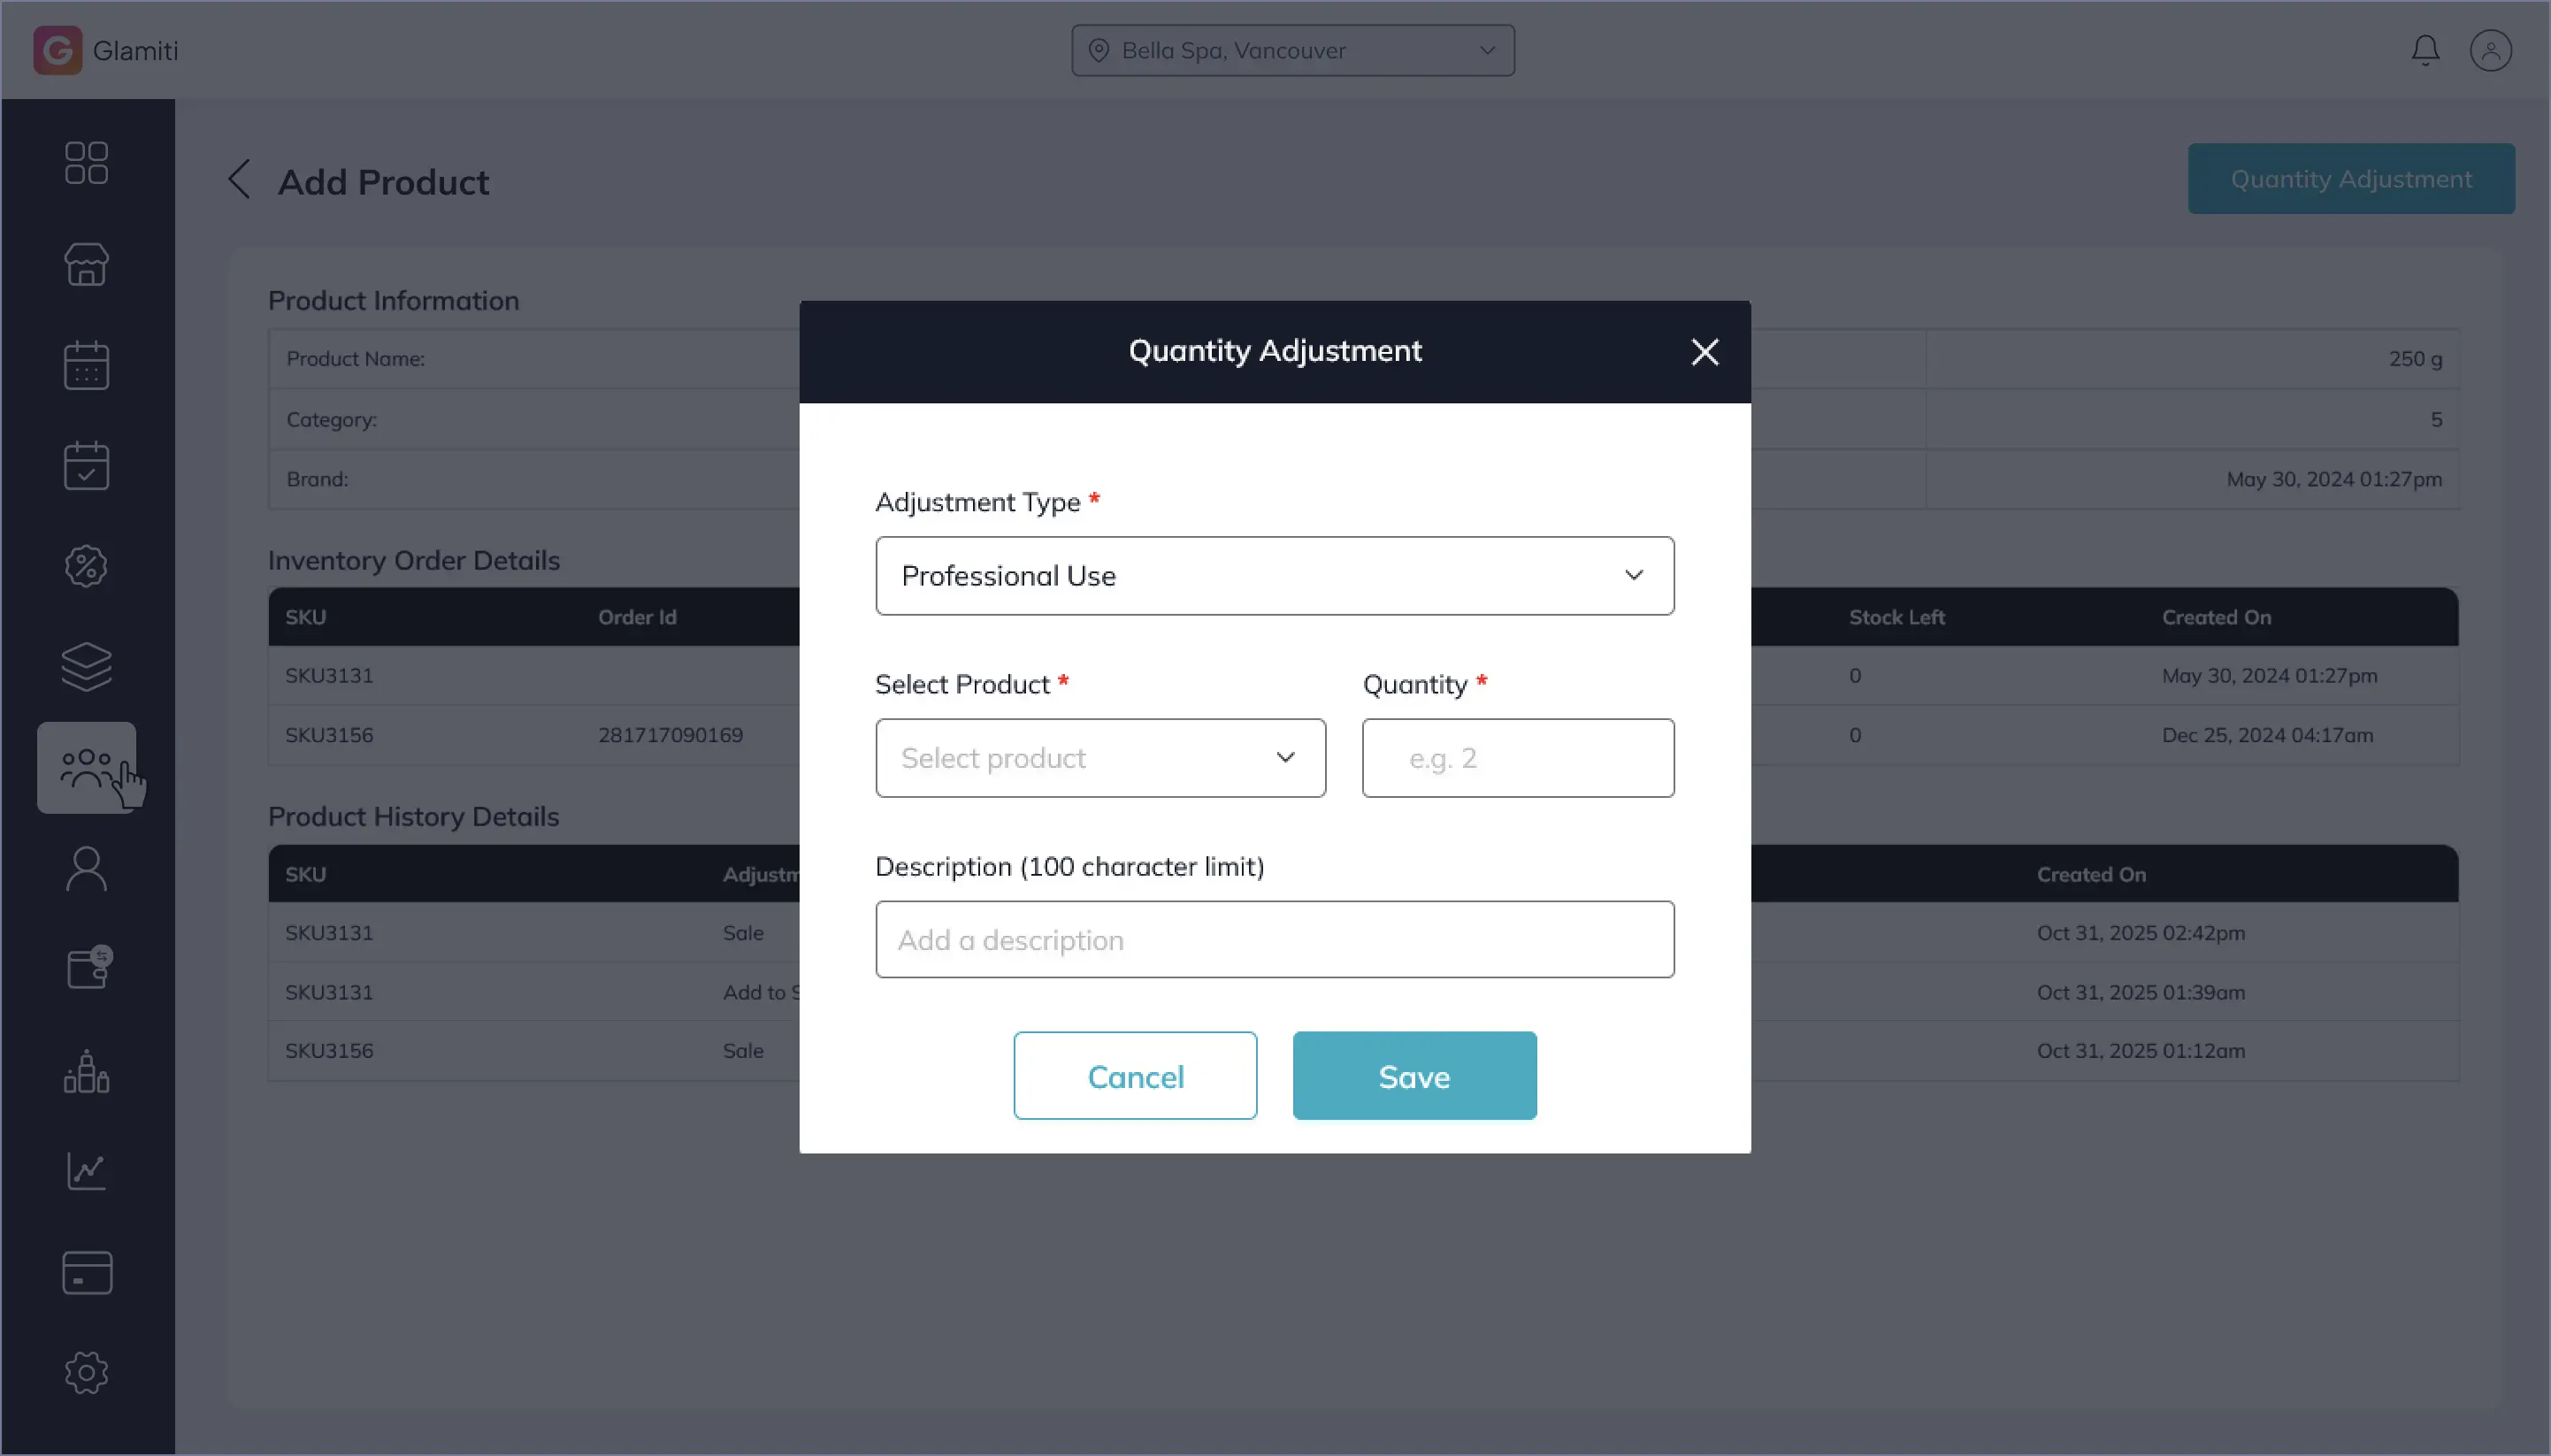
Quantity Management
Easily track and adjust product quantities:
1.
Navigate to the Inventory section and select a product.
2.
Click Quantity Adjustment(top-right corner).
3.
Choose the adjustment type:
◦
Professional Use (stock is deducted).
◦
Add to Stock (stock is increased)
4.
Select the product from the dropdown list.
5.
Enter the quantity and an optional description.
6.
Click Save.
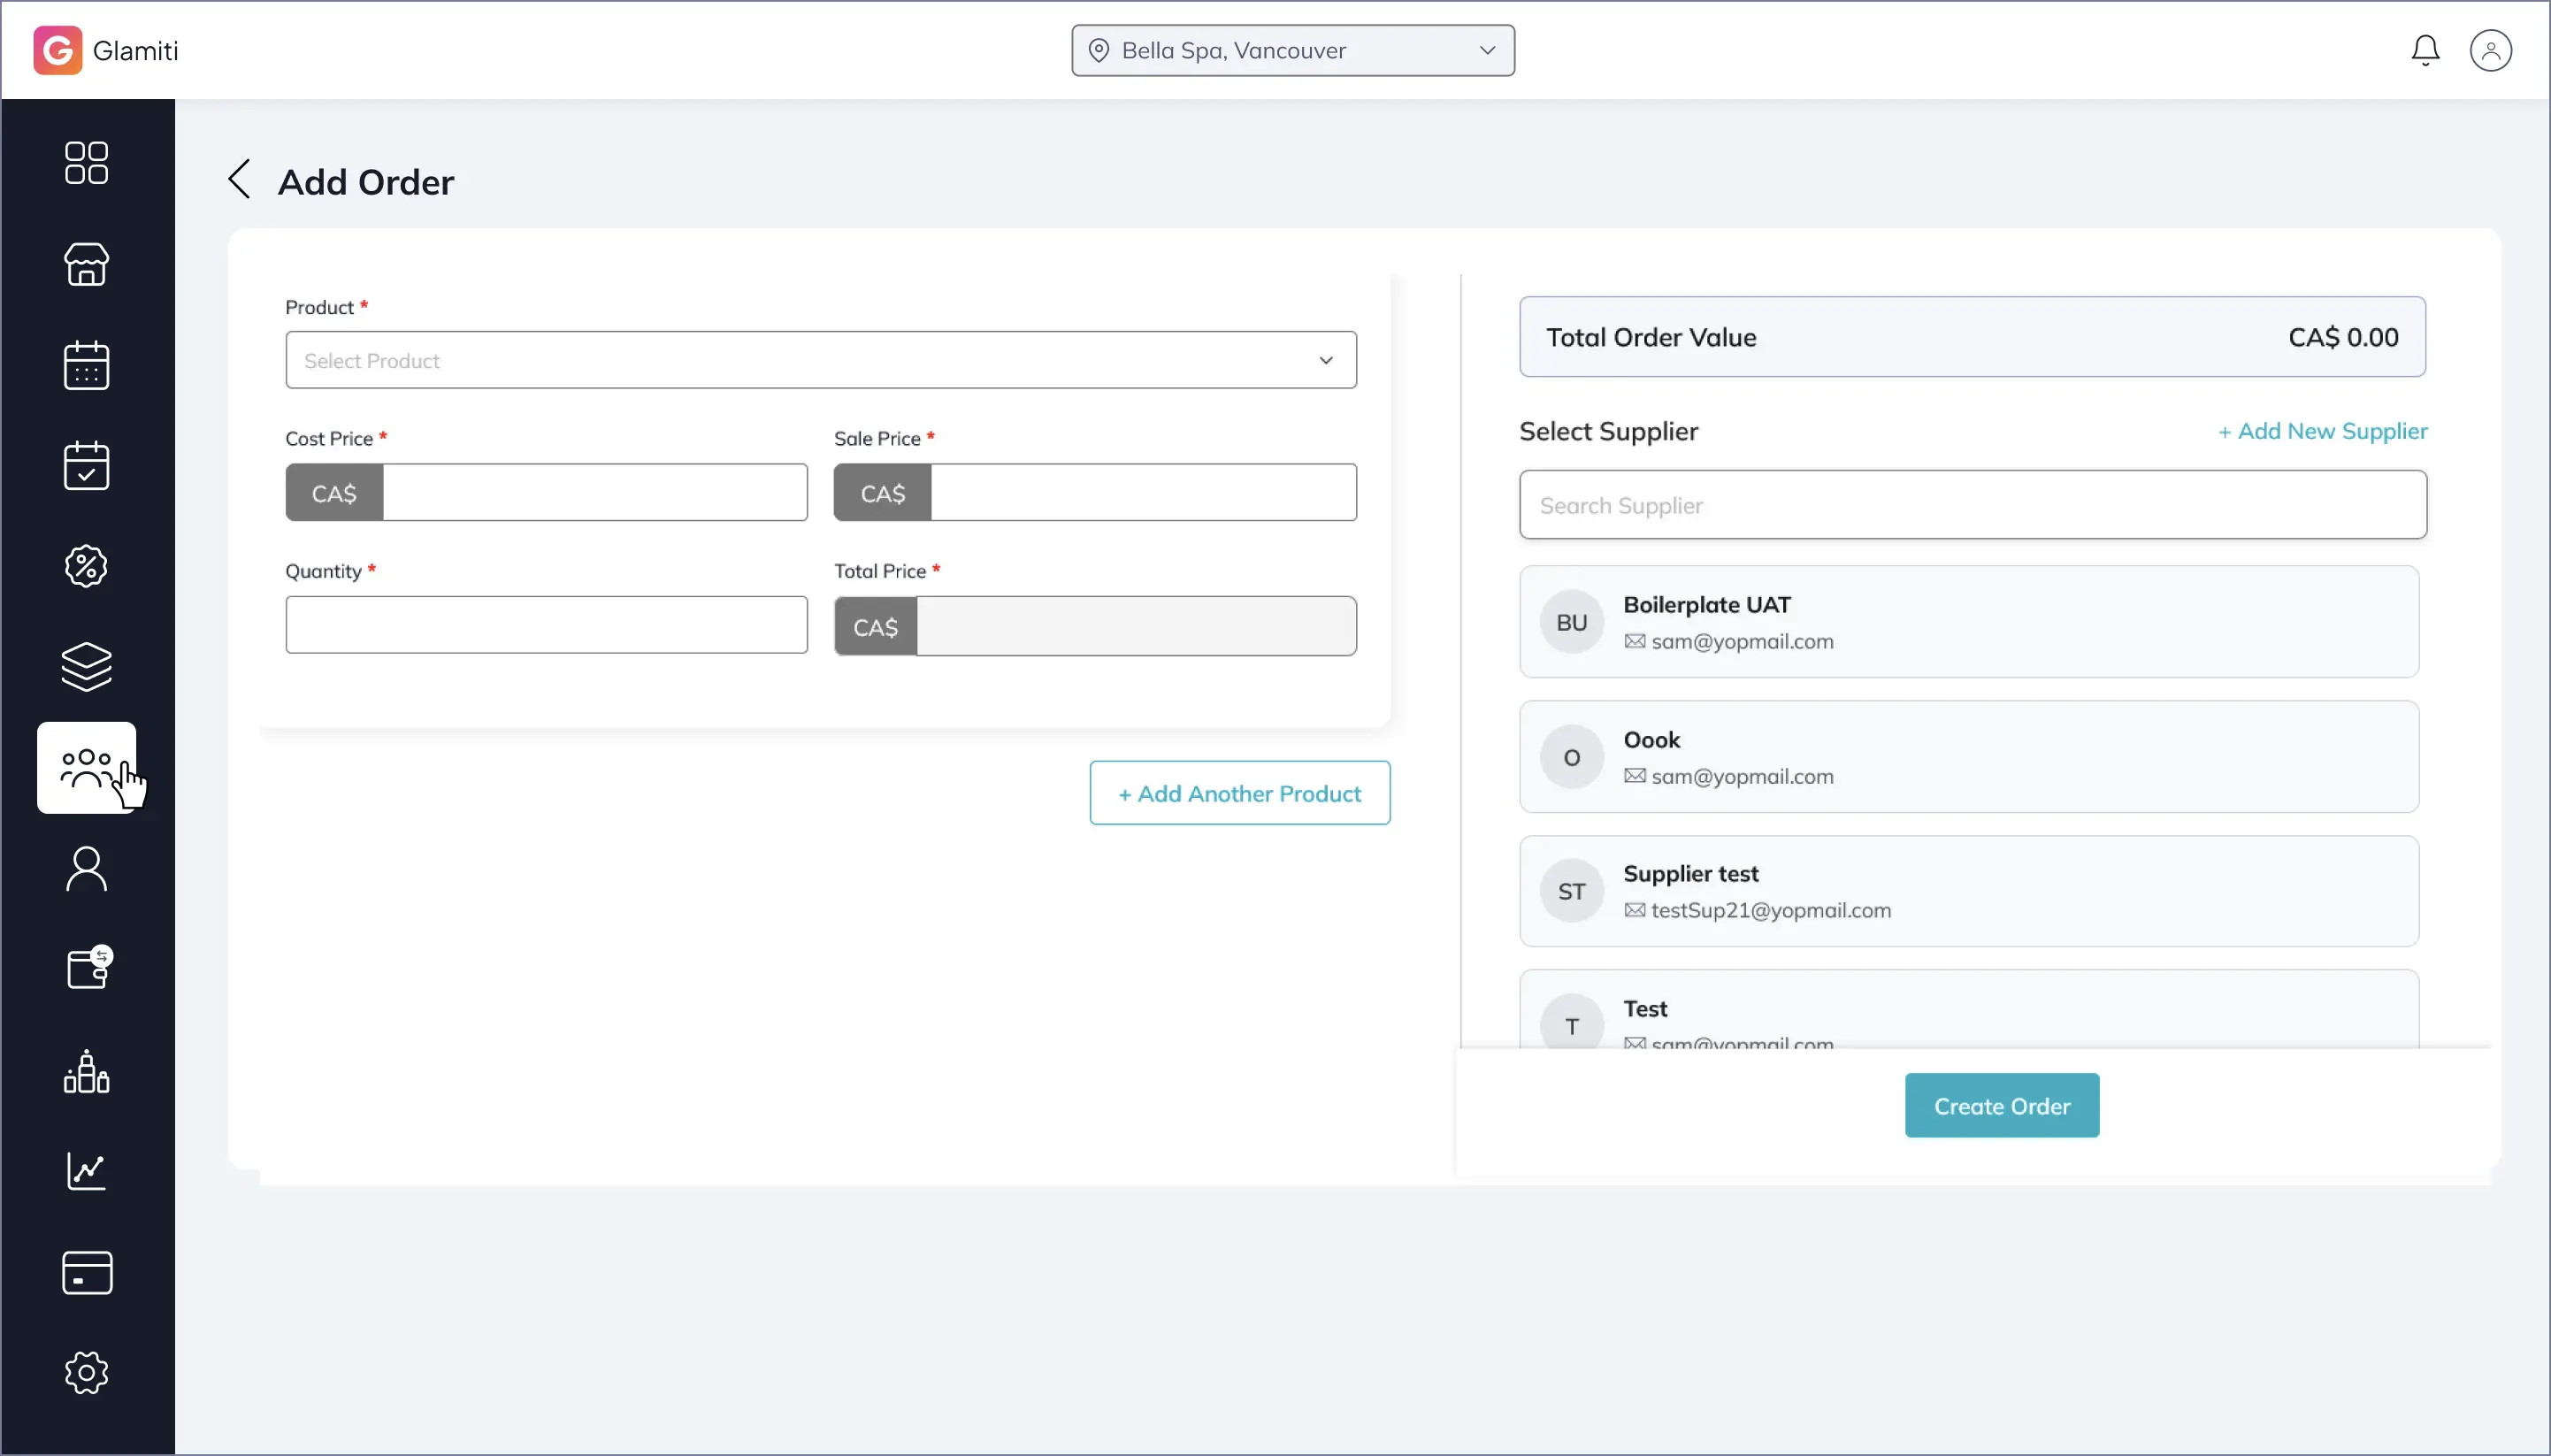
Manage Orders
Keeping track of stock levels helps you place orders at the right time. Before placing an order, ensure all products and suppliers are added to your inventory.
Create a Stock Order:
1.
Navigate to Inventory → More Options → Add Order.
2.
Select a Supplier.
3.
If you have multiple locations, choose the Delivery Location.
4.
Add products:
◦
Select low/out-of-stock items automatically or add them manually.
5.
Review the Order Quantity and Unit Cost.
6.
(Optional) Adjust the Expected Delivery Date (default: 3 days later).
7.
Add any additional costs (e.g., Shipping, Taxes).
8.
Click "Create Order".
9.
You can send the order via email or download it as a PDF.
Manage Brands, Categories & Suppliers
Manage Brands
•
Navigate to Inventory → More Options → Manage Brands.
•
Click Add Brand, enter the Brand Name, and click Save.
•
The new brand is now available for product assignment.
Manage Category
•
Navigate to Inventory → More Options → Manage Category.
•
Click Add Category, enter the Category Name, and click Save.
•
The new category is now available for product assignment.
Manage Suppliers
•
Navigate to Inventory → More Options → Manage Suppliers.
•
Click Add Supplier.
•
Enter the supplier's Name, Contact Person, Mobile Number, and Email.
•
Add the Supplier Address and an optional Description.
•
Click Save to confirm.
•
The new supplier can now be selected when creating stock orders.
Export & Import Data
Easily migrate your inventory data using Export & Import options:
Export Data:
Download a CSV file of your inventory.
Import Data:
Upload a CSV file to add multiple products at once.